
JX3 (Sword Net 3)
Before you start, make sure your camera, microphone, voice recognition, and so on are all set up and working.
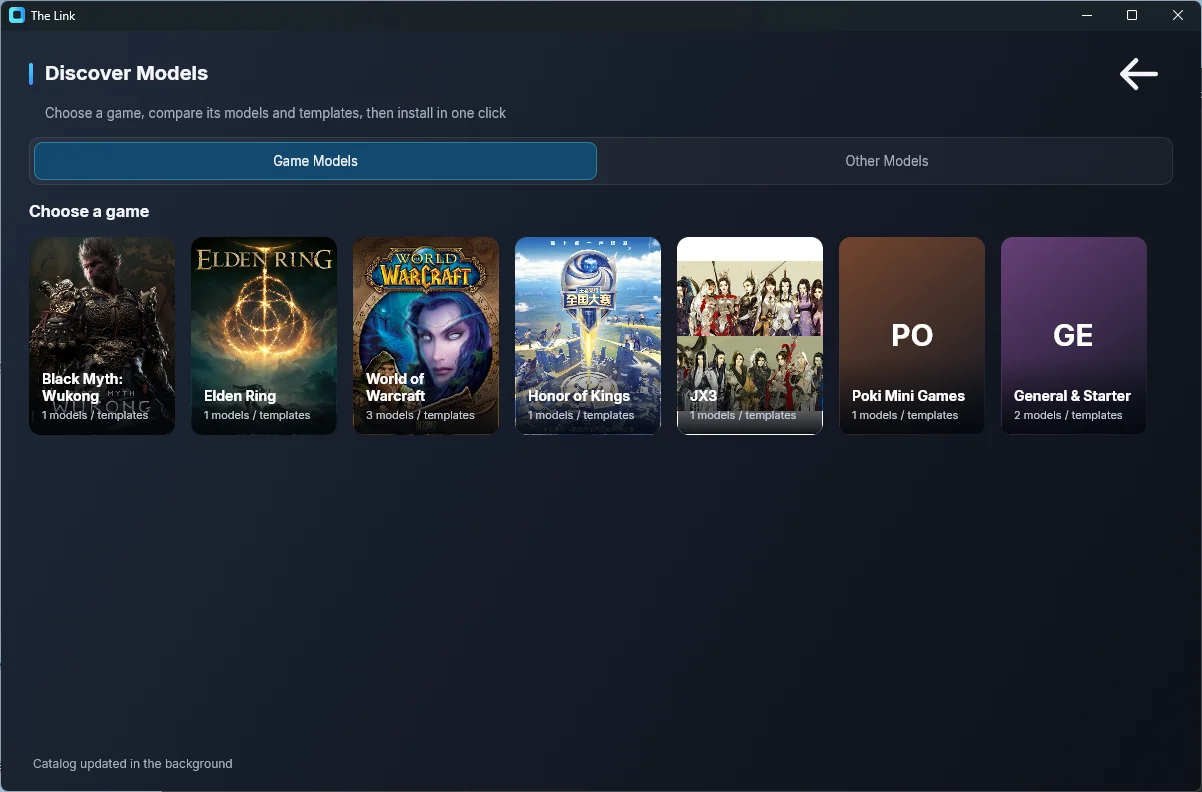
I have an official template for JX3 (JX Online 3), "JX3 — Qixiu". In the app, open Settings > Discover Models, pick the "JX3" game card on the Game Models page, then find the model card (it carries the "Official" badge and shows the author, likes, and download count) and click "Install" (Download & Load). The card also has "Demo" and "Guide" buttons:
Changing keybinds and retraining poses that don't trigger well or that you don't like
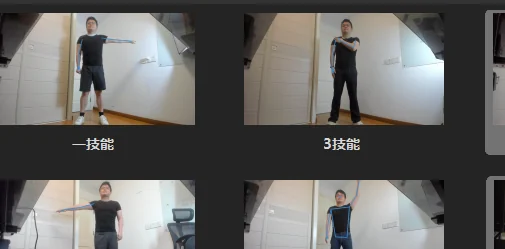
Each Link's little thumbnail is meant to look like your reflection in a mirror. Double-click the card to open the editor:
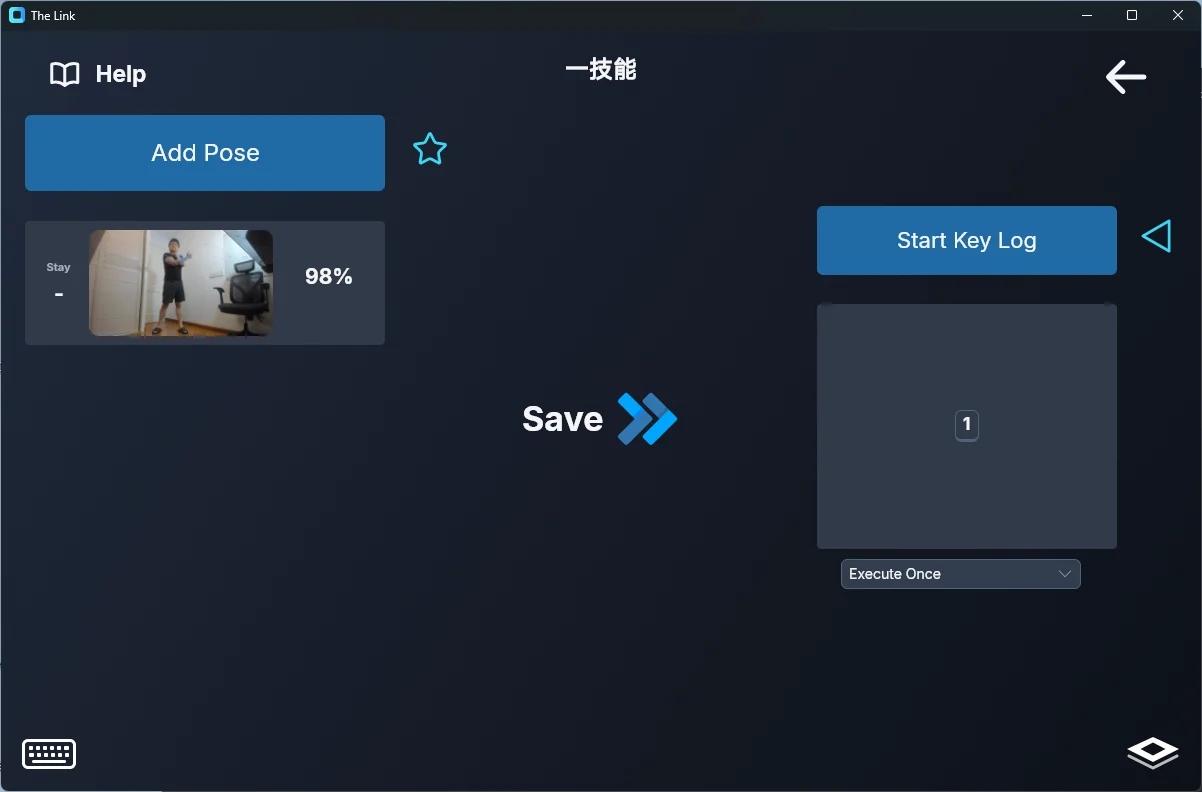
Remember to click the central Save button when you're done editing. For a full tour of the editor, see the Link Editor Overview.
If you run into trouble while designing a pose, check out: Pose Recognition and Hitbox
If you run into trouble recording keyboard and mouse output, check out Keyboard & Mouse Recording
Movement control
For details, see: Walk Recognition and Jump Recognition
Camera / turning control
My idea of imagining a virtual screen floating in the air takes some practice and decent hardware to feel really smooth. The camera-control Link uses the "Wrist To Mouse" output (the Look/Turn tab, commonly used for game camera / shooter control) — see Body Mouse for how it works and how to tune it.
I've also set it up so that, before every camera control action, the mouse is first moved onto your character. This prevents the situation where the mouse is over a UI element and you can't hold down the right button to control the camera. You can double-click the mouse-move step in the output timeline to edit the exact coordinates.
Dynamic camera control workflow
-
Raise your left hand and right hand at the same time. Keep the left hand raised, and use the right hand to control the camera rotation.
-
Lower the left hand first, then the right hand, to exit camera control.
Beginner-friendly camera/turning control:
In this template I've kept a beginner-friendly Link where your body orientation maps directly to turning. You can open it yourself, adjust the poses, and set your own hotkeys.

Tip for controller players:
The Link now has native Link Joy controller support (Settings > Link Joy), including gyro-to-mouse camera control. If you prefer turning the camera with a stick or gyro, you can pair a controller directly — no more need for third-party mappers like reWASD.
Mouse control
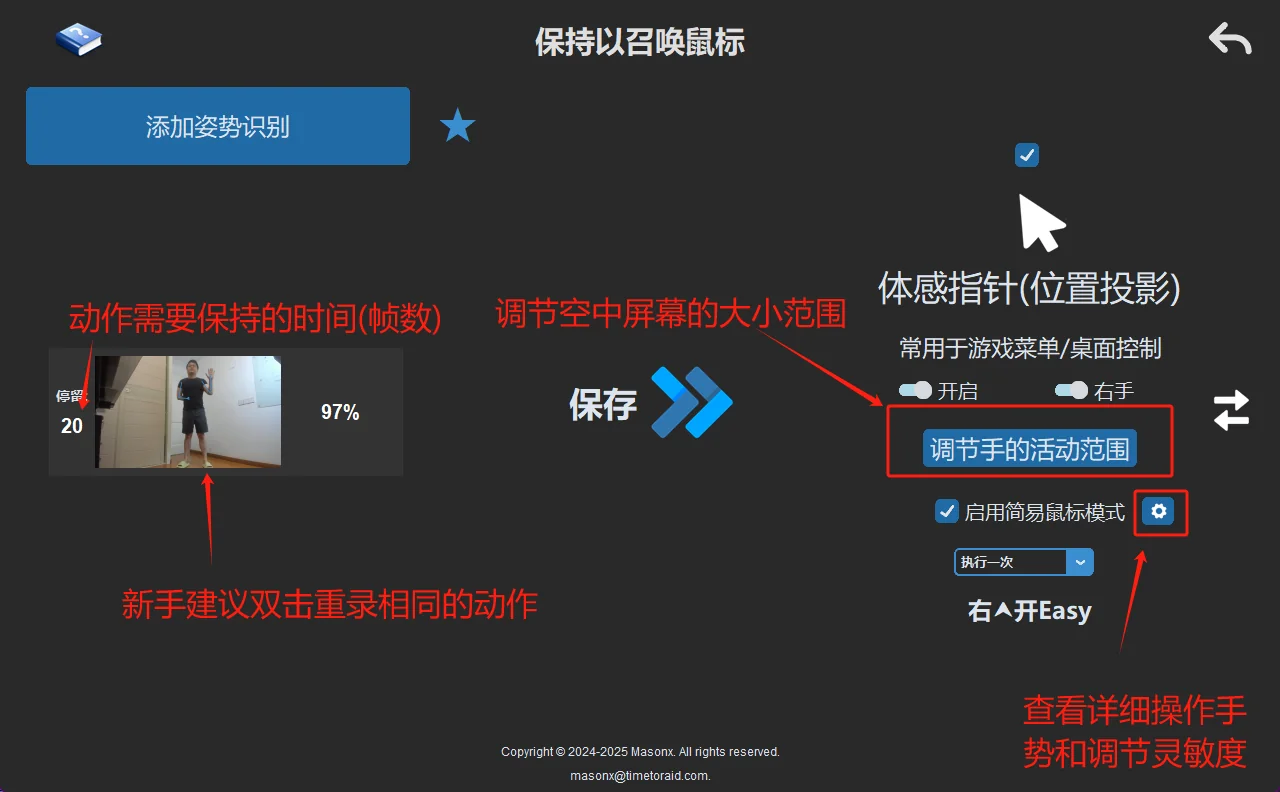
The default action to summon the mouse is:
Put your left hand behind your back and raise your right hand, then hold that pose for a moment.
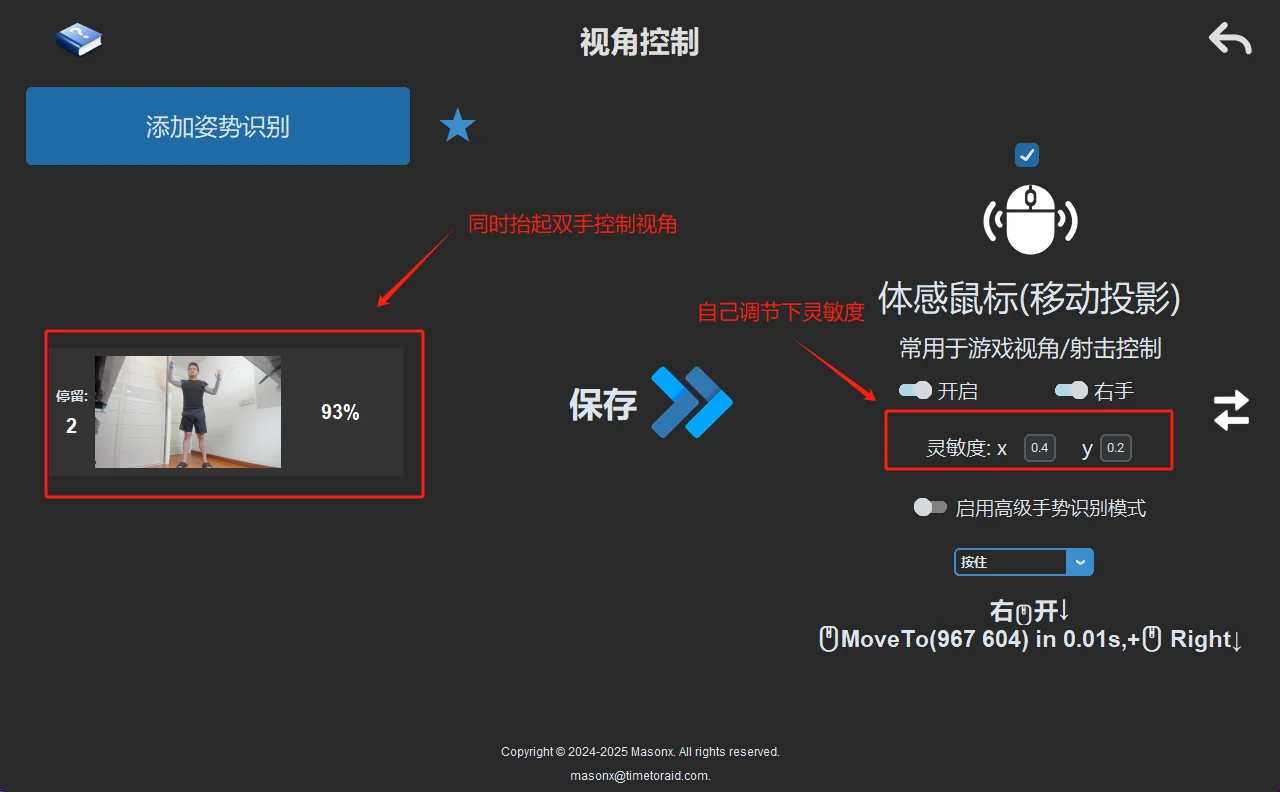
This Link's output is "Wrist To Cursor" (the Desktop/Menu Mouse tab of the Body-Mouse popup, commonly used for game menus and desktop control):
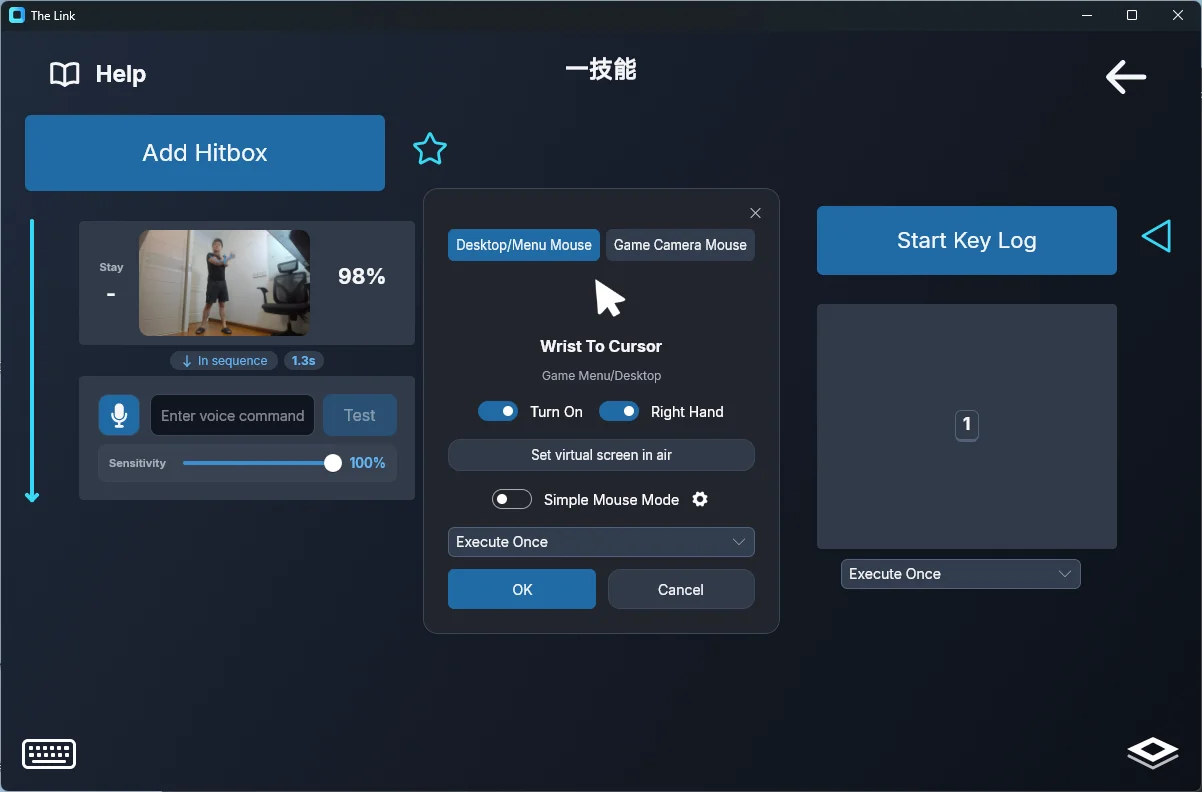
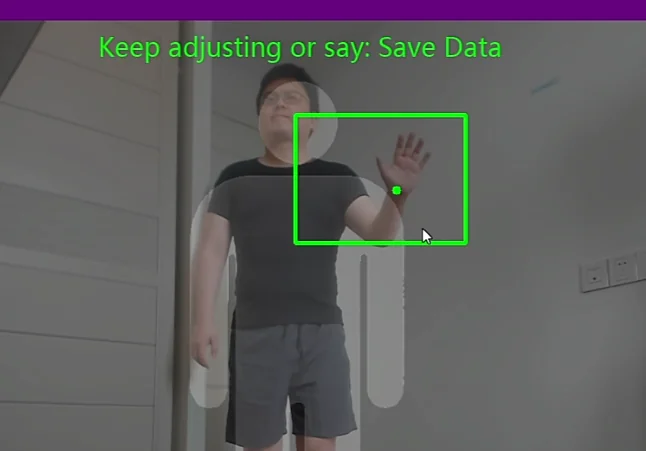
Adjusting your hand's range of motion
Similar to camera control, this mode is like moving your computer screen to the spot you're controlling. Your right wrist is synced to the mouse position on screen. Specific gestures map to left click, right click, and the scroll wheel.
Click "Set virtual screen in air" in the popup to draw the frame. Draw it as small as you can, so that your hand stays facing the camera even when you're pointing at the edges of the screen.
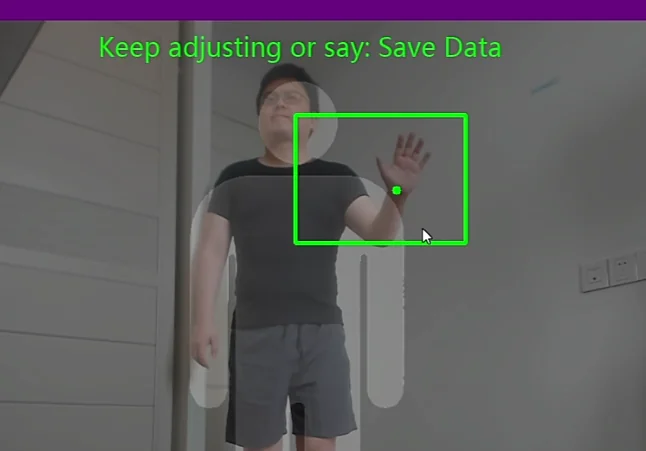
Of course, if your mouse is jittery, you can also draw a large frame and shift your body left and right instead, so you keep your hand facing the camera while clicking the left and right mouse buttons.
Setting the Simple Mouse Mode parameters
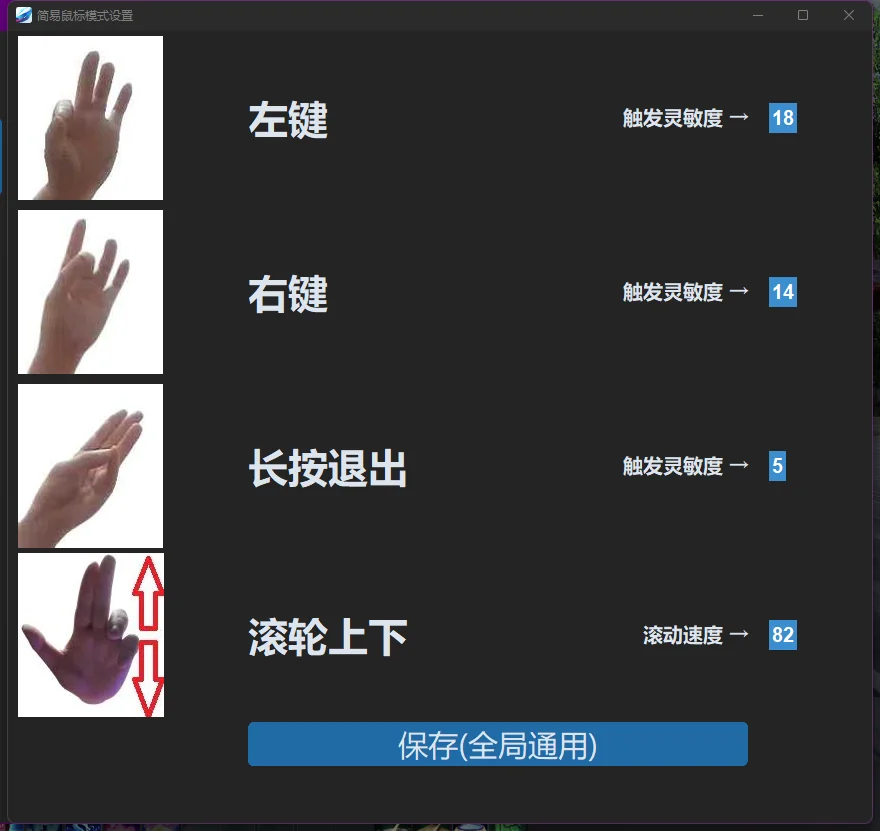
Turn on "Simple Mouse Mode" in the popup, then click the little gear settings icon next to it to see the click gestures and adjust the sensitivity (I recommend not changing it too drastically — adjust it a little at a time).
Simple Mouse Mode uses the most intuitive index-finger-plus-thumb pinch and index-finger-plus-middle-finger pinch, so you don't need to match the gestures in the pictures exactly.
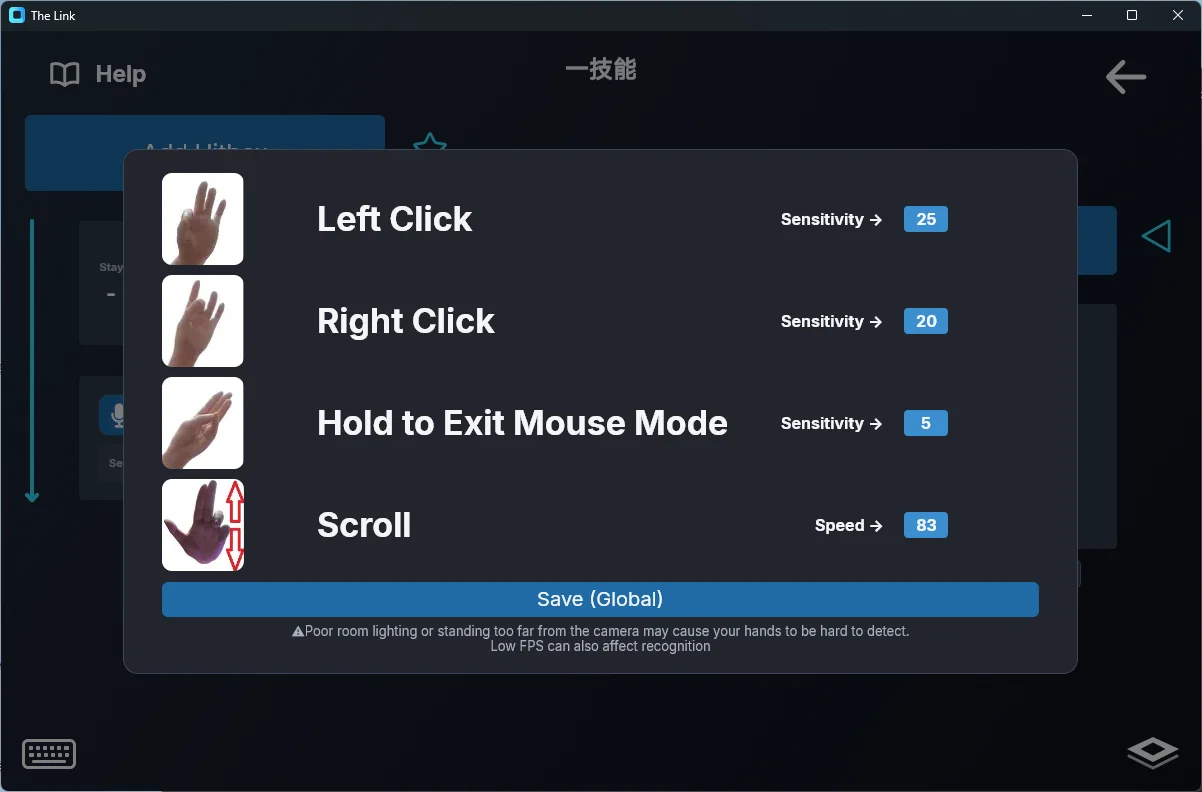
Note that you have to hold the exit gesture to leave Simple Mouse Mode before Pose Recognition turns back on.
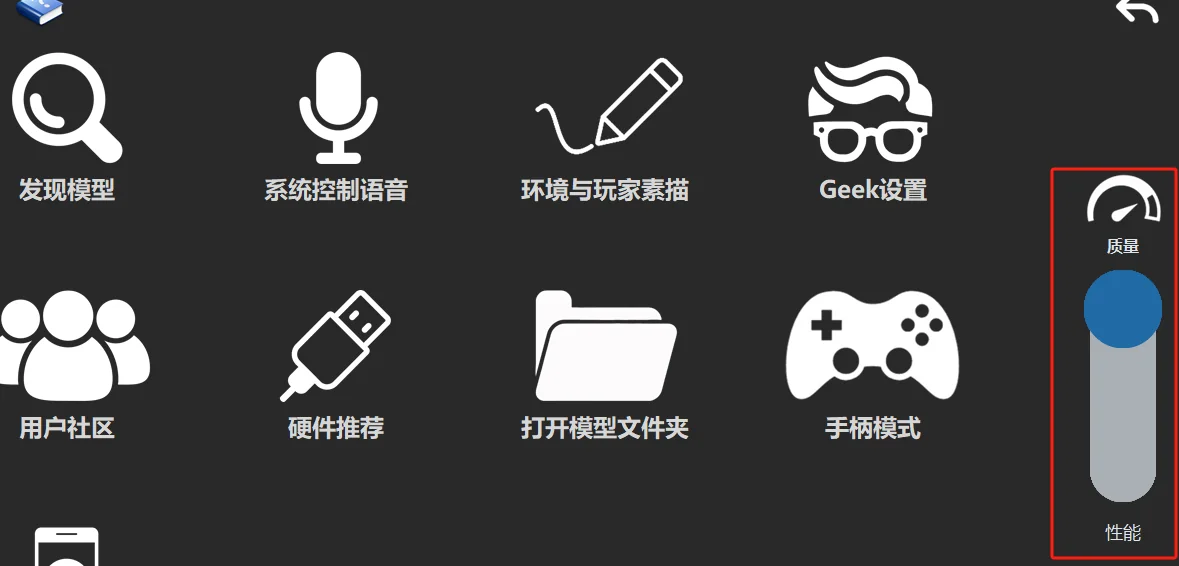
This mode is also affected by your computer's performance and your camera's frame rate. If your setup meets The Link's recommended specs, your frame rate in this mode should be 50+.
If your frame rate is too low, move the performance notch on the right side of Settings down a level (Standard / Fast / Ultra Fast):
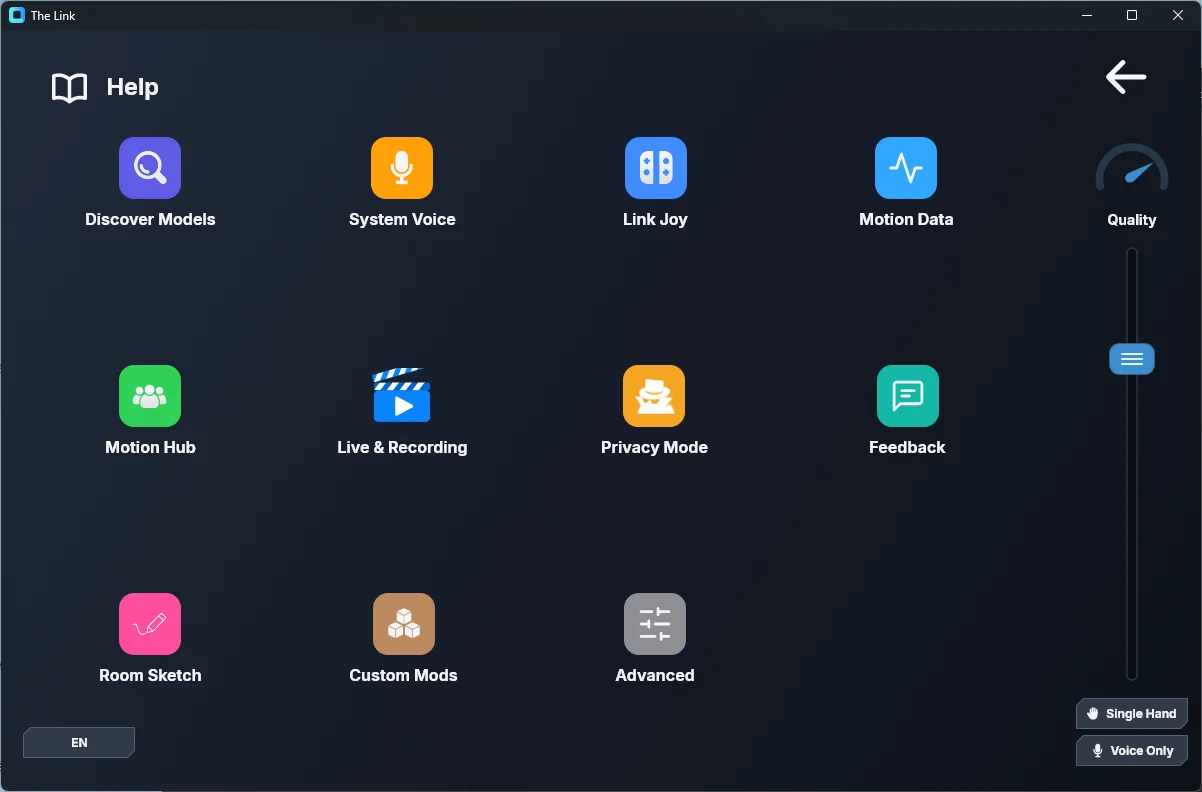
For more on this, see Wrist To Cursor
Qinggong (lightfoot/flying) and mount: dynamic page switching
Qinggong (lightfoot)
When you raise your left hand to activate Qinggong, the page that normally controls movement is temporarily turned off, and the Qinggong control page is turned on. This is done with the "Page Toggle" output: the Qinggong Link taps W twice and holds W, and its output also carries a "Movement Off, Qinggong On" page toggle.
If I understand it correctly, Qixiu's (Seven Stars) Qinggong is "tap W twice, then hold W down."
In other words, just raising your left hand horizontally will tap W twice and then hold W down. Players of other schools can redesign this themselves.
When you lower your left hand, movement returns to normal and the Qinggong page is turned off.
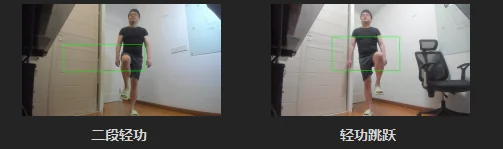
For Qinggong's jump and ascend moves, I used a Hitbox to guarantee the fastest, most stable triggering. Please adjust the Hitbox's position yourself so that your knee lands accurately inside the Hitbox every time you raise your leg.
Riding (mount)
In the same way, once you summon your mount, the page that normally controls movement is temporarily turned off and the riding page is turned on:
Adjust the X and Y sensitivity for steering the mount with your right hand to suit yourself. Beginners should set the Y sensitivity lower. I've also set the "jump with spacebar" while mounted to raising your right leg, so that your right hand doesn't fly up and shake the camera around when you jump — which is better for beginners.
Accidental interruptions
Sometimes while using Qinggong or riding, we accidentally — or because of some sudden event — interrupt the Qinggong or riding state. If you then forget to perform the exit action, this leaves you with movement control disabled.
You can perform the Qinggong toggle action again at any time:
Or the dismount action:
to exit the Qinggong or riding state and restore movement control.
You can also bind "enable movement and turn off Qinggong/riding" to your most frequently used attack action, to make sure you're always on the correct movement control page whenever you want to attack. In the editor, click ⇄ > "Page & Link Control", pick the "Page Toggle" tab in the popup, and use "Add Page — On" / "Add Page — Off" to add the page switches to the output:
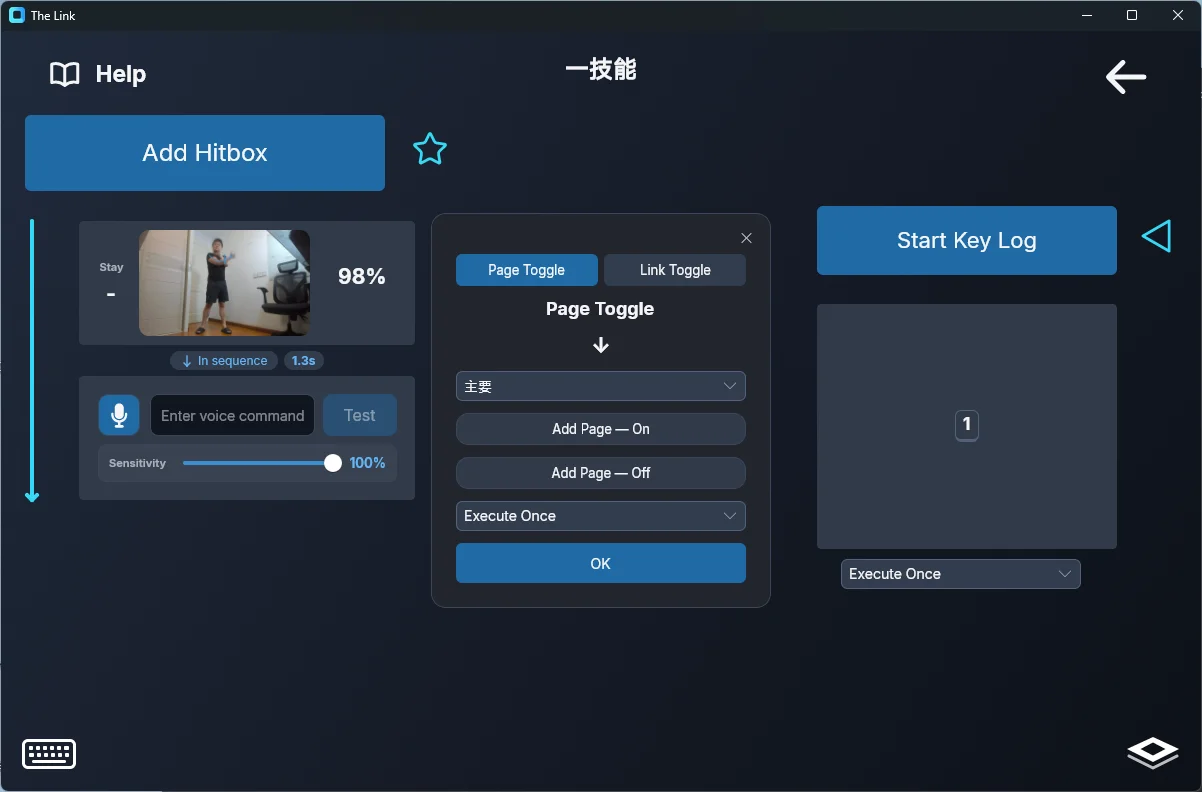
See Page Toggle for more.
Voice commands
So that I don't accidentally trigger voice commands while recording videos, I added a prerequisite action to every voice command — you have to perform the action first, and only then will speaking trigger that voice command.
In the editor this is done by chaining a pose input and a voice input in the same Link with the logic set to "In sequence":
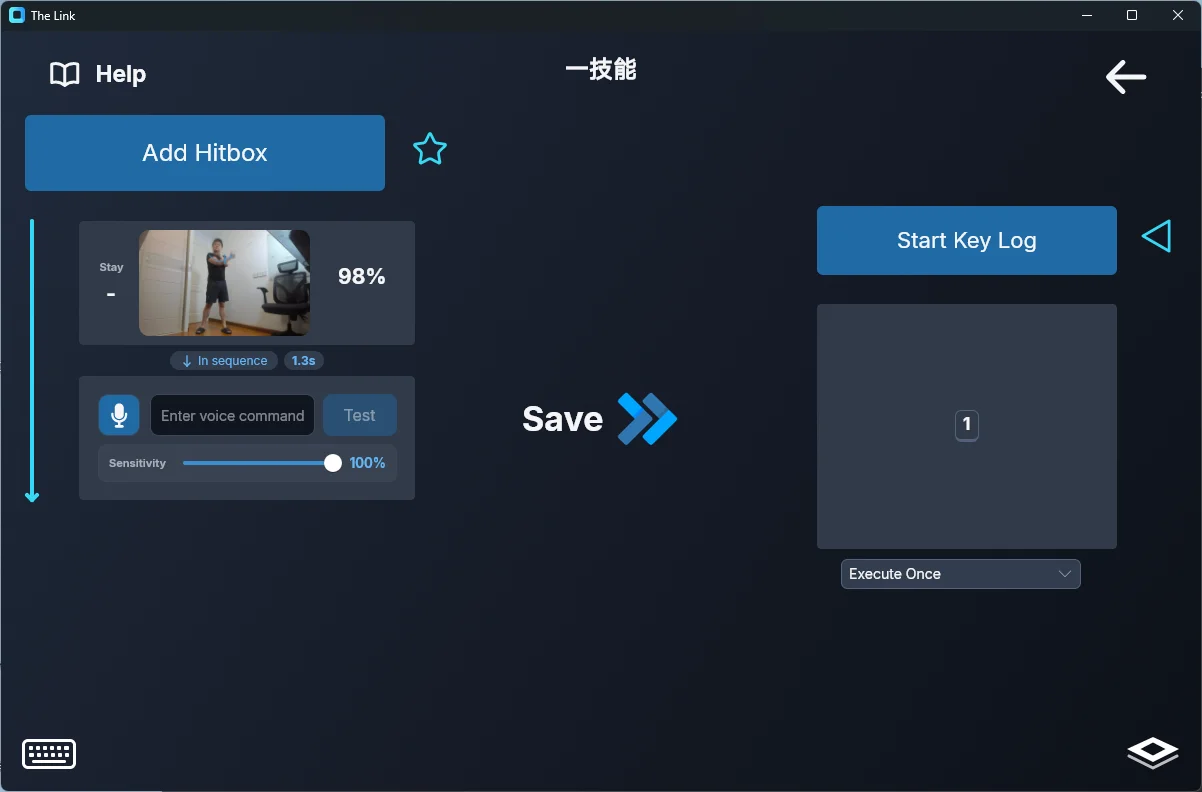
If you play alone and your environment isn't noisy, you can delete the prerequisite action and keep only the voice input.
Mapping mouse clicks to in-game icons
Click the ▽ output menu next to the recording button
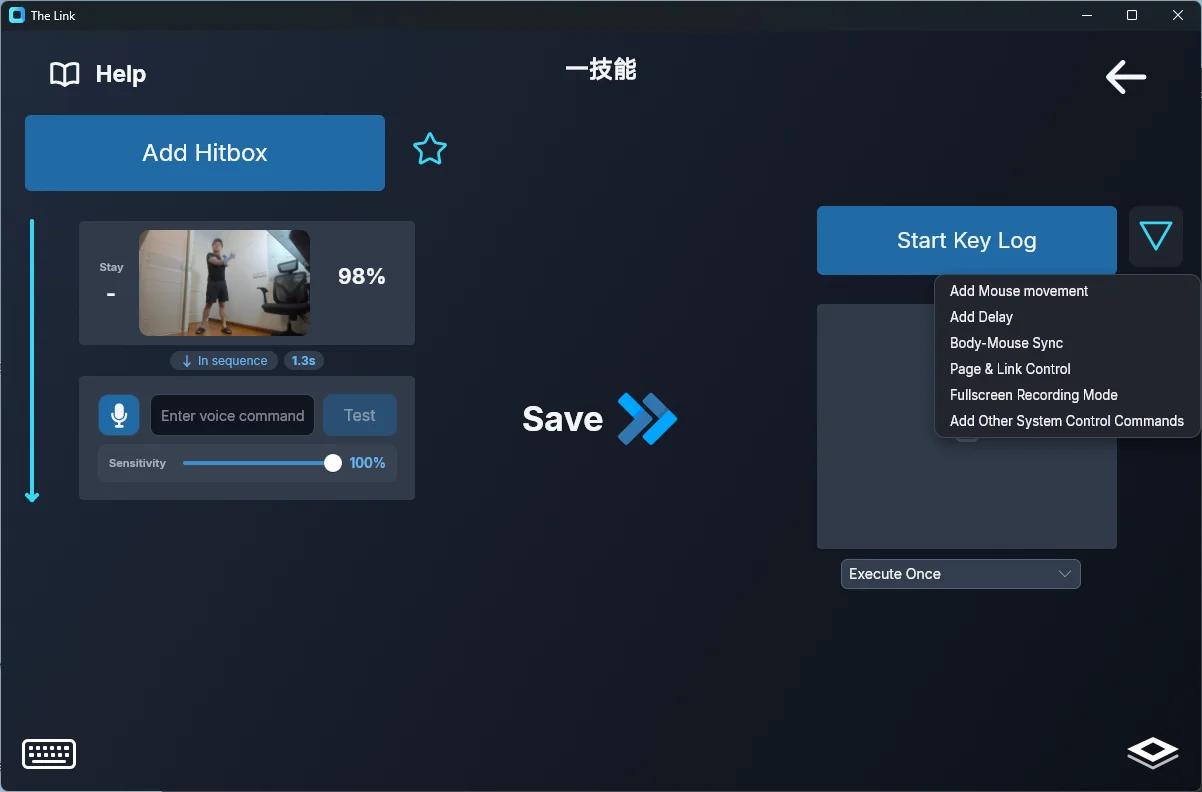
and choose "Add Mouse movement". The first time, you pick between "Absolute position" and "Relative movement". With "Absolute position", the screen dims into a capture state — switch to the view you want, click the target spot, and the coordinates are recorded.
For a Link that's already set up, double-click the mouse-move step in the output timeline to re-edit the position.
You can also go the other way and drag, for example, your pet's icon onto the mouse position I set up, so that the positions for attacking and for summon/retreat all line up correctly.
For more on this, see Keyboard & Mouse Recording