
Main Interface Overview
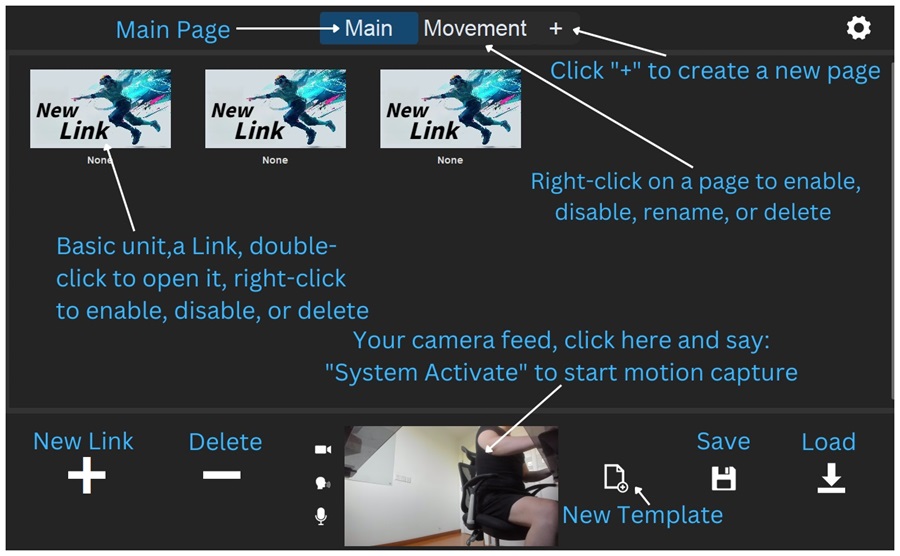
The main window is the first thing you see when The Link opens. It has three areas: the top row (Help, page tabs, Settings), the Link card grid in the middle, and the bottom row (phone pairing, overlay, camera, and model management).
Top Row
Help
The book icon Help in the top-left opens the help panel: pick a symptom for quick troubleshooting, or browse the full manual, the quick-start guide, and video tutorials.
Page Tabs
The row of tabs in the middle holds your model's category pages (for example Main, Movement, Voice). You can:
- Click a tab to switch pages. A disabled page turns grey but you can still open it to view and edit its Links.
- Drag a tab to reorder pages.
- Double-click a tab to rename it in place.
- Click the + on the right to add a new category page; the new tab opens ready for naming.
- Right-click a tab for the page menu: Enable / Disable / Rename / Delete. The first page cannot be deleted, so its menu has no Delete entry.
To toggle pages dynamically in-game with poses or voice, see Switch Page.
Settings
The gear ⚙ in the top-right opens the settings hub: performance mode, system voice, overlay, privacy mode, Discover Models, and more.
The Link Card Grid
The grid in the middle shows every Link on the current page. Each card is a pose thumbnail plus a name and a small output-type icon; disabled Links appear dimmed.
- Double-click a card to open the Link Window and edit its inputs and outputs.
- Click to select a card; hold Ctrl and click to multi-select, or drag a marquee over empty space to select several at once.
- Drag cards to reorder them.
- Right-click a card for the menu: Enable / Disable / Copy / Cut / Rename / Use bottom image as cover. Enable and Disable apply to every card in the current selection.
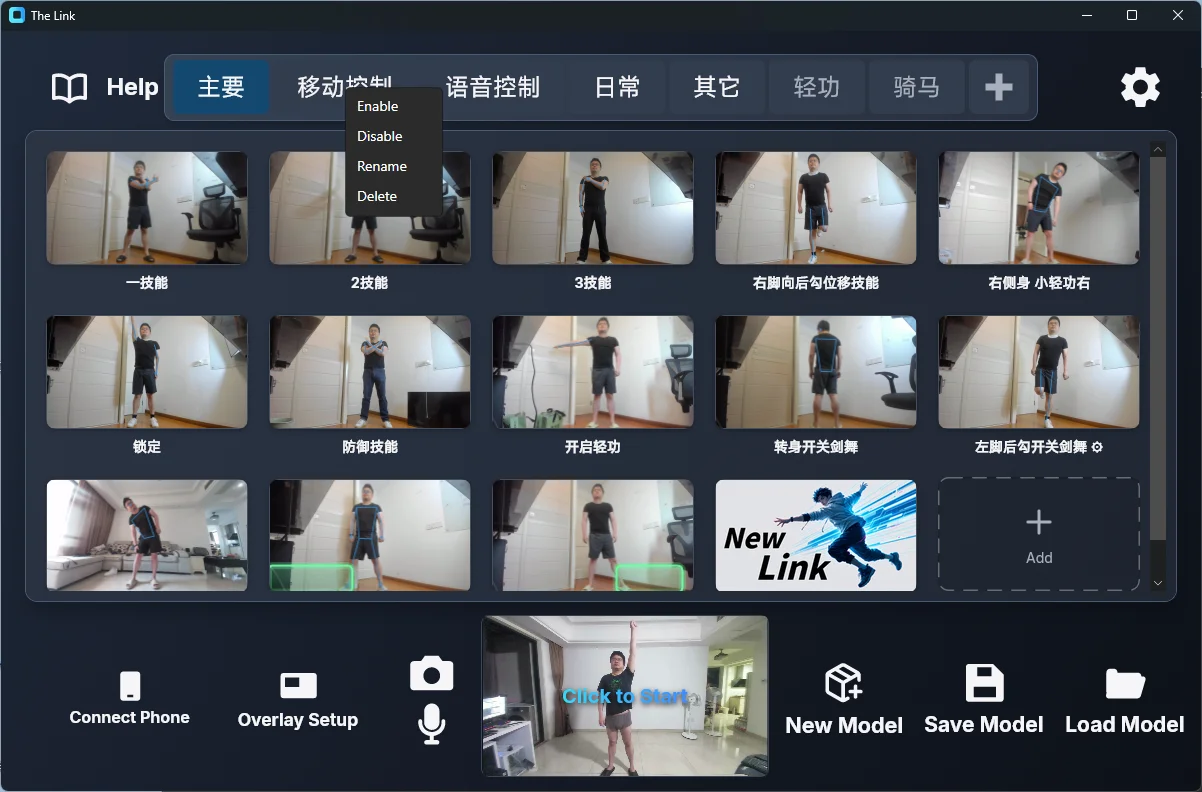
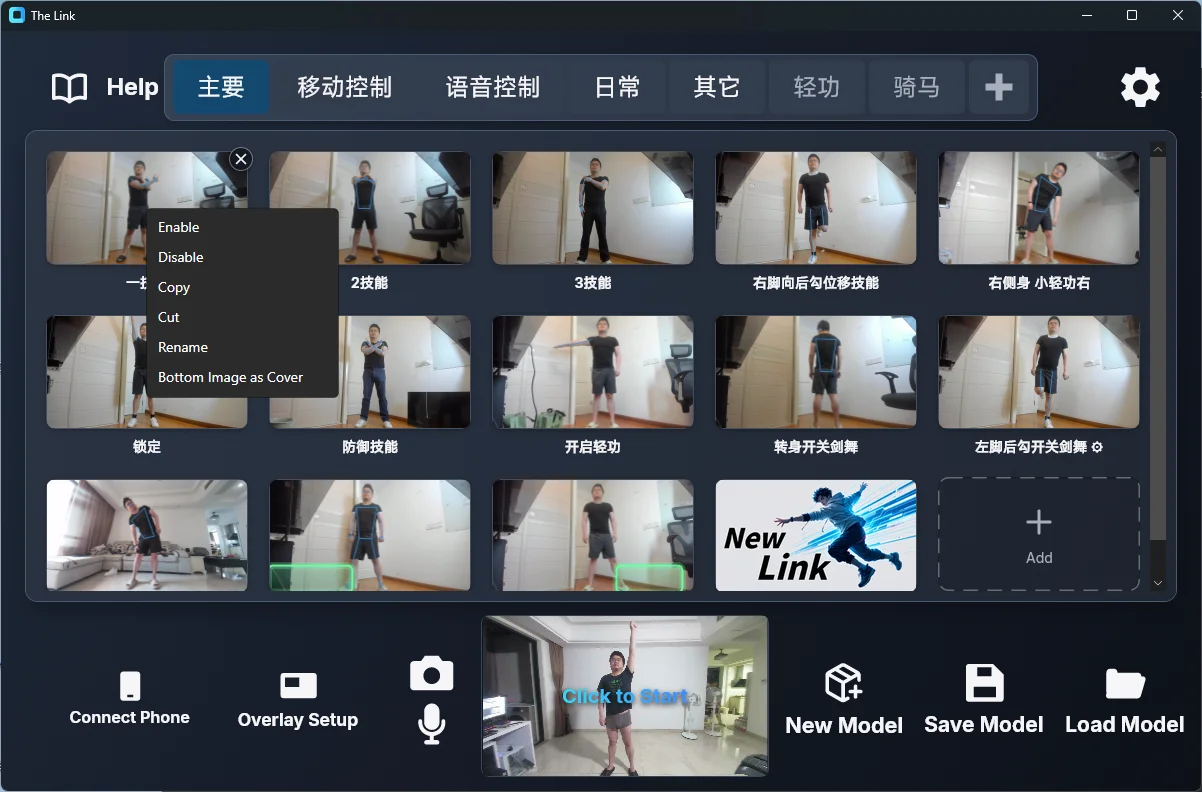
Note there is no delete entry in the menu: to delete a Link, click the ✕ that appears on the top corner of a selected card, or select it and press Del / Backspace. F2 also renames the selected Link.
The grid always ends with a dashed Add ghost card — click it to create a new Link.
Bottom Row
Connect Phone
If this PC has never paired a phone, opens the Get the App download QR first. Scan it with your phone, then choose Already have the app? Continue to Pairing to reach the pairing QR. If this PC has current or saved pairing information, it opens the phone pairing/reconnection panel directly. The large app-icon button at the top-left of that panel can reopen the download QR in every connection state. See Use Your Phone as Camera & Mic.
Overlay Setup
Configures the translucent in-game overlay (visibility, hotkeys, trigger bar, and more). See Translucent Overlay Window.
Camera / Microphone Pickers
The camera icon 📷 and microphone icon 🎤 open the camera and microphone panels, where you can switch devices, rotate/mirror the image, and pick a resolution. See Camera and Microphone.
Camera Preview (the Start Button)
The small camera preview in the middle is The Link's start button: it shows a Click to Start hint — click it to begin motion recognition.
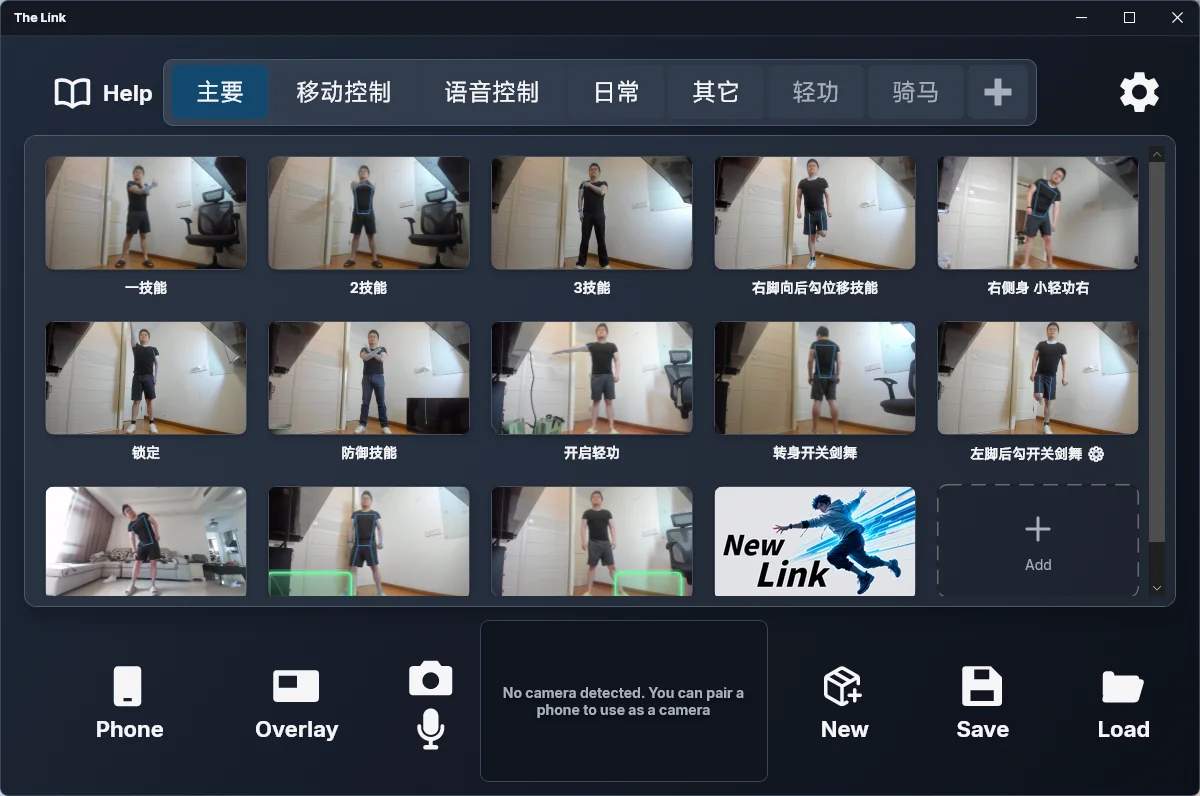
The screenshot above shows the state with no camera connected. Once a camera is connected, that area becomes a live feed with the Click to Start hint overlaid on it.
When there is no feed, the preview shows the current state instead:
- Camera initializing — the camera is opening, give it a moment.
- No camera detected. You can pair a phone as the camera — no usable camera was found; click Connect Phone.
- No camera detected — tap "Phone Camera" on your phone to start — a phone is paired and the app is waiting for it to start streaming.
- Voice-only mode · Click to Start — voice-only mode is active; you can start without any camera.
- If you checked Disable camera preview in the camera settings, the preview stays black, but clicking it still starts the system.
New / Save / Load Model
The three buttons in the bottom-right manage the whole model (all pages and Links): create a blank model, save the current one, or load a saved one. See New / Save / Load Model.